A Campervan Conversion Project
Intro
There is an already long-lasting trend to convert vans (or panel vans) into mobile homes (or recreational vehicles, "RVs").
At first, I thought this was a relatively new thing that got popular with YouTube recently, but once I talked
to other people I found that this has run for decades already.
I had this dream for at least 13 years: traveling freely with a motorhome throughout the world,
exploring places that I could otherwise never reach and sleeping wherever I like.
Well, looking at the market of new RVs, prices were beyond me. Yet, not only was the cost factor overwhelming but also the shipping times of over a year kept me from moving on with that subject. In 2020, the second-hand market for motorhomes was blown out, too. And then there was Covid-19. With the social distancing and all other events vanishing, I decided (together with my wife, though) to buy a used panel van and convert it into our very own, individually crafted, customized to our preferences, camper van.
The Foundation - a Used Panel Van
I knew it is not unlikely that I might screw the whole project up. I am not properly educated in basically any discipline that was required to realize such an endeavor. Hence, I'd never work on a new panel van, so I looked around for a used panel van. My must-have requirements were the following:
- max. weight of 3.5 metric tons (including everything)
- max. length of ~6 meters
- a height so that I can comfortably stand upright
- enough power to still go conveniently fast uphill
- no more than 180.000 Km mileage, not too old (more than 10 years)
- good shape (not much rust), a fresh warranty of fitness check-up
- three seats in the front row (back then, my wife and I were planning our first child)
- A/C in the front
- affordable
The list of nice-to-have wishes included:
- all-wheel drive
- not a parcel delivery vehicle in its first life
- cruise control
- offered close to where we live
- pilot seats
I decided relatively quickly against the 4WD as those vehicles often do not have much loading capacity. Sure, massive material for the drive takes up more of the total weight. The total weight will become an issue on its own later anyway. That's why I looked for a rather lightweight panel van.
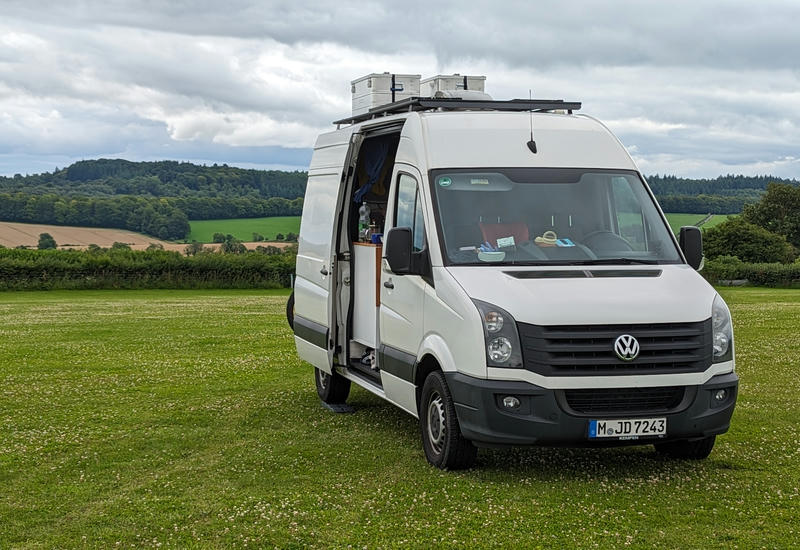
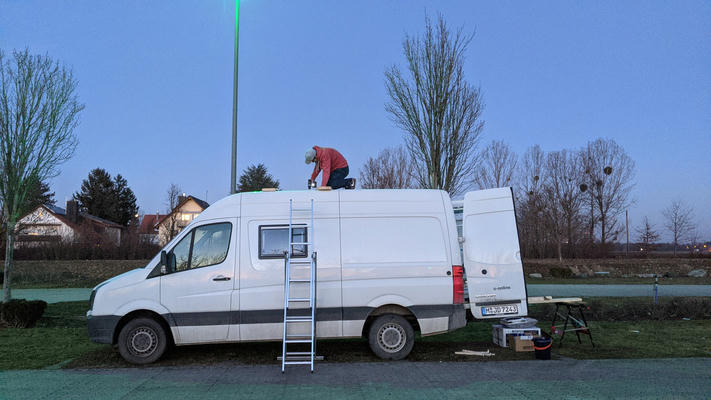
 I found this affordable beauty and bought it from a jumble sale trader. The Volkswagen Crafter
(shipped in 2017) ticked many boxes and is almost identical (except for the front and the motor) to
the Mercedes-Benz Sprinter.
We gave the van the name "Bob".
I found this affordable beauty and bought it from a jumble sale trader. The Volkswagen Crafter
(shipped in 2017) ticked many boxes and is almost identical (except for the front and the motor) to
the Mercedes-Benz Sprinter.
We gave the van the name "Bob".
Interior Planning
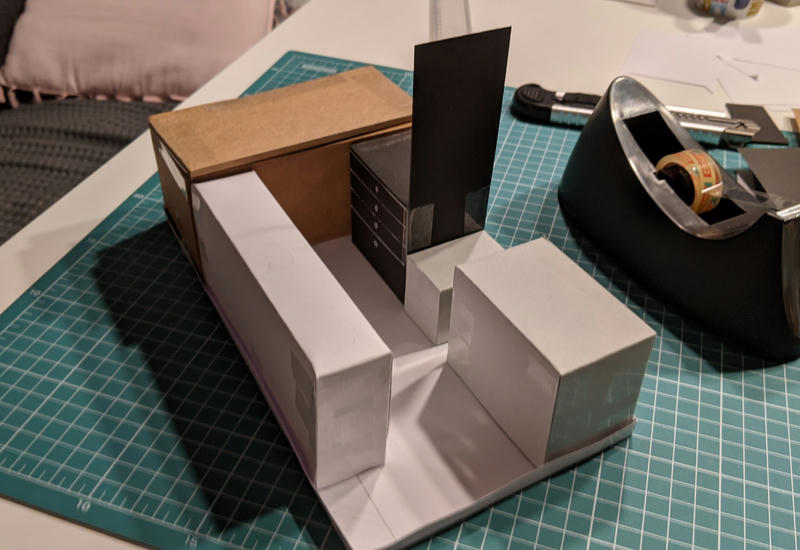
To get inspiration for the creation of the inside, my wife and I watched a good amount of YouTube videos from other conversions and we studied professional interior layouts. After we bought the panel van, we spent a couple of hours capturing the inner dimensions. That wasn't easy as there is not a single straight plane in the car. Everything is round and molded, hence very complicated to put on paper.
 I planned the interieur using TinkerCAD. With a set of 3D models drawn in this
CAD ("computer-aided design") tool, I was able to create a (well, not very) precise plan of the inside of the van.
I planned the interieur using TinkerCAD. With a set of 3D models drawn in this
CAD ("computer-aided design") tool, I was able to create a (well, not very) precise plan of the inside of the van.
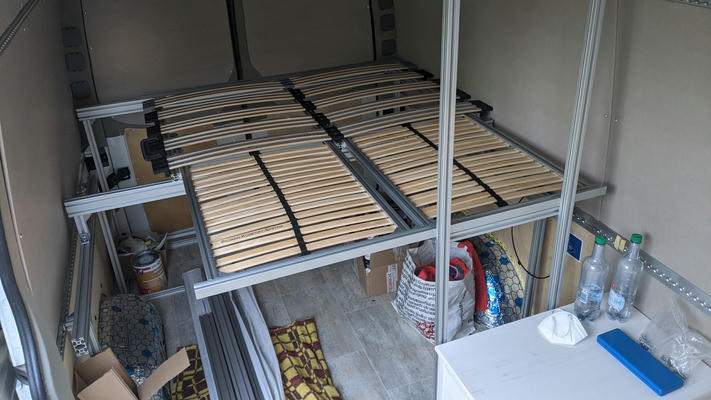
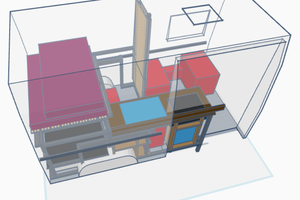 With a 3D paper prototype of the planned layout, I was able to confirm our assumptions and make the necessary tradeoffs. For example,
we wanted to sleep on an almost standard-sized (1.40 m x 2 m) bed. That's why we had to plan a slide-out bed construction to sleep parallel to the walls.
With a 3D paper prototype of the planned layout, I was able to confirm our assumptions and make the necessary tradeoffs. For example,
we wanted to sleep on an almost standard-sized (1.40 m x 2 m) bed. That's why we had to plan a slide-out bed construction to sleep parallel to the walls.
Bob is optimized for the following parameters:
- Great sleep
- Good seating inside, space around the head
- A proper kitchen (with sink)
- All season, all weather off-grid camping (active heating and enough power capacity)
- Storage for utilities (e.g. a bike trailer for toddlers, awning) and weight
- Keeping the appearance of a standard panel van; for wild camping ;-)
A little less focus was put on:
- A proper bath (chemical camping toilet inside, outside shower)
- Warm water (to be boiled on the cooker)
- In-car entertainment (no TV or radio)
- Costs (I did not try to build the cheapest possible construction)
- Time to build
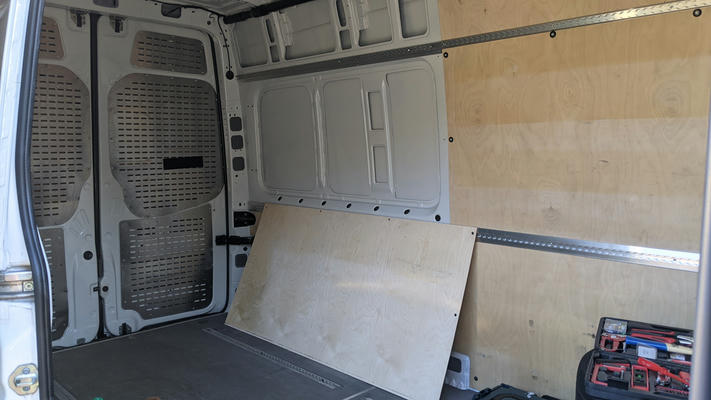
Conversion Basics
The conversion basics include:
- removing the old inside decoration (shelves, hooks, etc.)
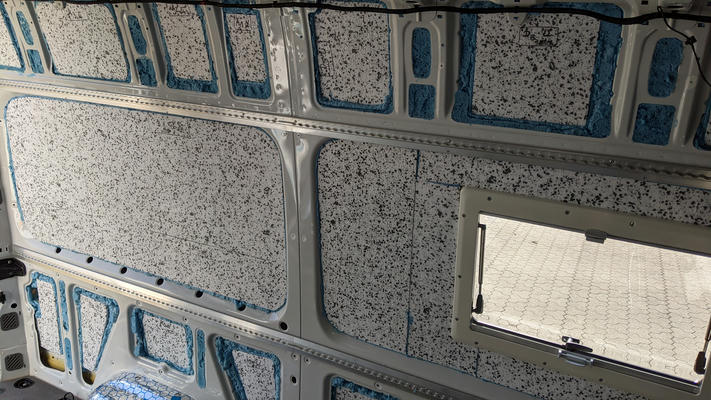
- adding special anti-noise tiles on all wide steel panes (to isolate from external noise, for example, rainfall)
- cutting two holes in the body for windows (one on the side, one on the roof)
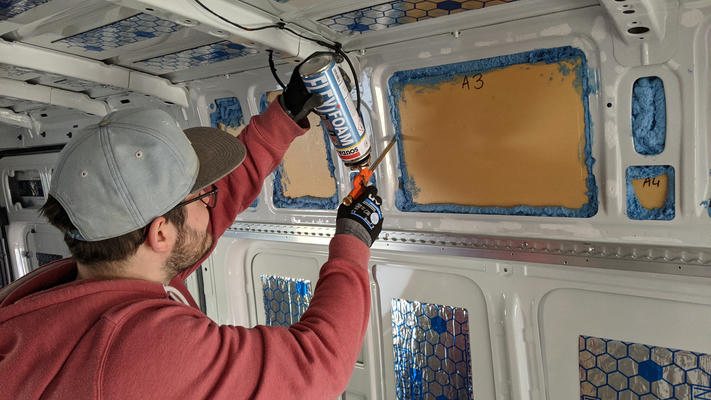
- adding proper insulation (for cold and sunny days): I decided against Armaflex and for ordinary insulation materials (i.e. XPS, styrofoam and elastic foam)
- laying out a proper floor with insulation, a stable ground plane and a PVC floor
- adding a diesel-based heating module under the floor of the van; drilling a hole in the diesel tank to add a diesel pipe to the inside of the van (this work was carried out by a professional car garage)

I had Volkswagen add a cruise control since there was none installed in the original car.
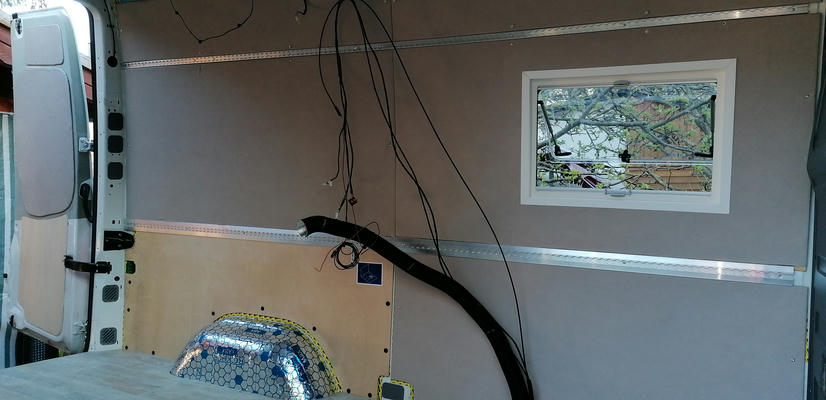
To make the inside of the motorhome more pleasant, we covered all wooden panels with artificial leather and almost all parts of visible steel were covered with grey soft-touch vlies.
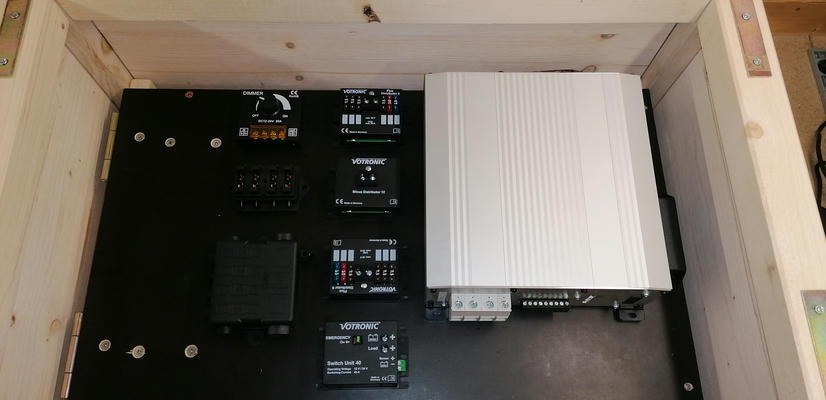
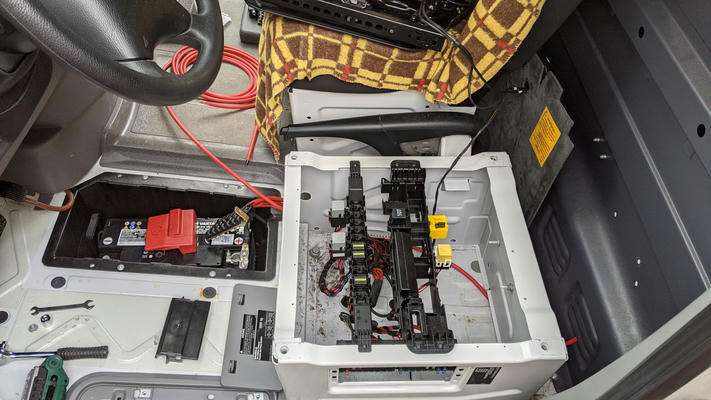
Electricity and Wiring
To get a grasp on the power requirements, I created a spreadsheet with all electric devices and added my assumption about our
power consumption and standing times. I planned to add a so-called "booster" that charges our battery during the drive from the car's generator and recharges via solar panels.
To be as independent from external power sources as possible I bought a massive 200 Ah lithium battery. The following appliances (all on 12 V DC) are installed in the motorhome:
- a fridge (with freezer)
- a diesel heater
- a diesel cooker (Webasto; this cooker is killing it)
- a roof fan with an automatic lid (remote control)
- LED lights (two dimmable channels of LED spots in the roof, two flexible spotlights in the front and the back of the car)
- control panels
- a 2.8 bar water pump
- USB and 12 V outlets
- water tank sensors (fresh/waste water)
- a rear-view camera with infrared lights
I planned to charge devices like smartphones, laptops, Bluetooth speakers and other smaller devices regularly in the car. To power
AC devices (up to 300 W), I ended up with a little inverter that connects to a 12 V DC outlet and provides a 230 V AC power source with a German plug.
The electric wiring was carried out following some German specifications for in-car installations (maybe there are some minor violations, but that's ok). That means, I only used flexible wires with correct diameters in separate shells, acceptable cable connections and bridges, fuses for every wire and so on.
For the whole process of drafting the electrical layout and rolling it out in the motorhome, I got support from my dad. He knows how to properly plan and build such installations.

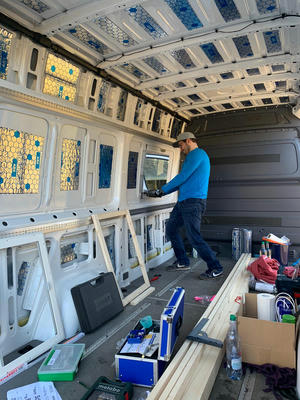
Furniture
To change the type of the German car registration (set to a motorhome) one needs the following statically mounted in the van:
- a seat
- a table
- a bed
- a cooking unit (these are requirements of the German car registration authorities)
Together with my wife, I built all of that. The foundation was created from an alloy frameset
(I call it the skeleton) that is tightly connected to the walls and the floor of the RV.
We mounted plywood to the frame to make up the furniture including drawers, shelves and other
storage facilities. We installed the sink, the water system, the cooker and everything
else onto that frame. The system is extendable and yet still customizable.
After finishing these tasks, I went to an authorized reviewer who eventually created a document that confirms that Bob is a class B (max. 3.5 metric tons) motorhome now.
Why is that interesting? - It is much cheaper than any regular car in terms of taxes and insurance fees in Germany. With a driving-ready weight of about 2.9 tons (i.e. full diesel and water tank, the driver), Bob can carry another 600 Kg of additional load for any kind of amusement and other passengers.

Testing the New Home
From time to time, I took a break from work to test the constellation - sort of an iterative implementation model that I practice in my professional life, too. That made sense for at least three reasons:
- when camping: see if the practical use is given
- when driving: see if everything holds together and whether there are any annoying noises
- pause: take time off as this is very exhausting and stressful
With each iteration, I became more happy about the result. It feels like everything is where it belongs, but maybe I am now just used to it. The limited space is filled very thoroughly to make use of every inch in the RV.
A Peek into the Details
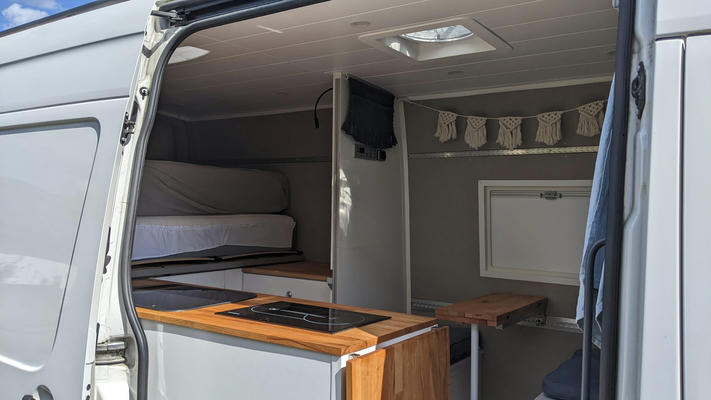
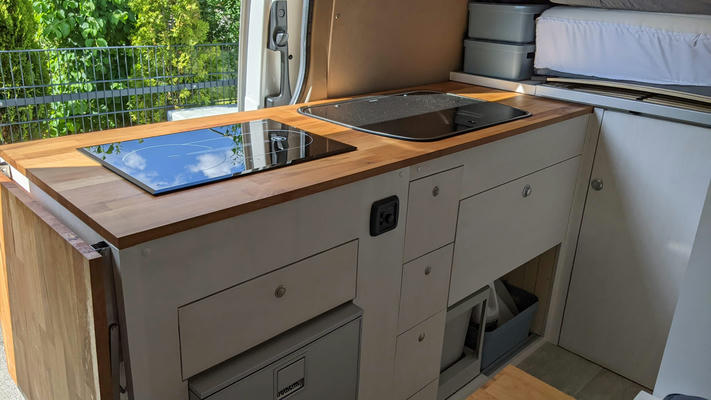
The Kitchen
Bob's kitchen has everything you need for tasty meals. The cooktop is located near the large sliding door to allow steam and smog to escape. The sink can only be used if the bed is not in the sleeping position.
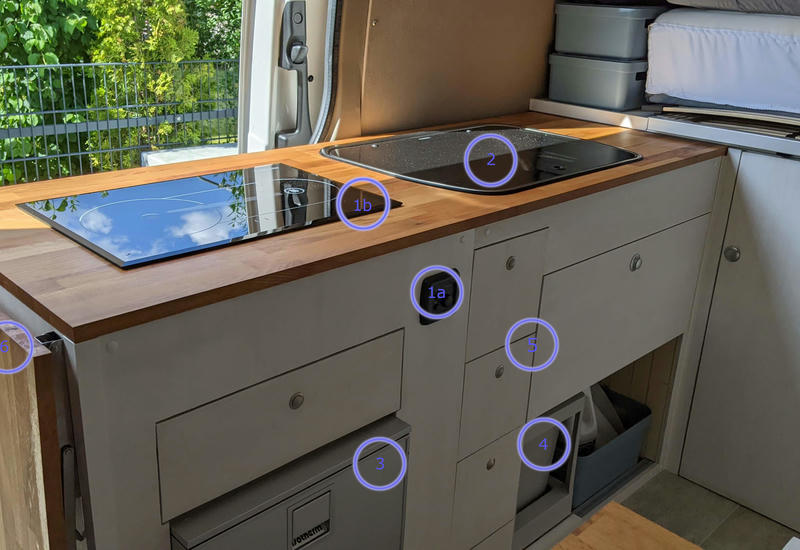
1a: Cooker Control
1b: Cooktop (hob)
2: Foldable sink (closed)
3: Fridge with freezer
4: Slide-out trash bin
5: Multiple drawers of different sizes
6: Foldable countertop extension
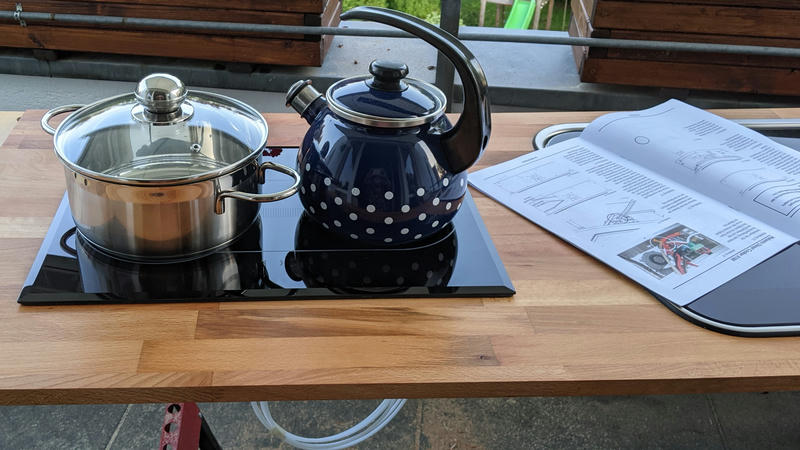
Webasto Diesel Cooker
This Webasto Diesel Cooker is one of my highlights in the van.
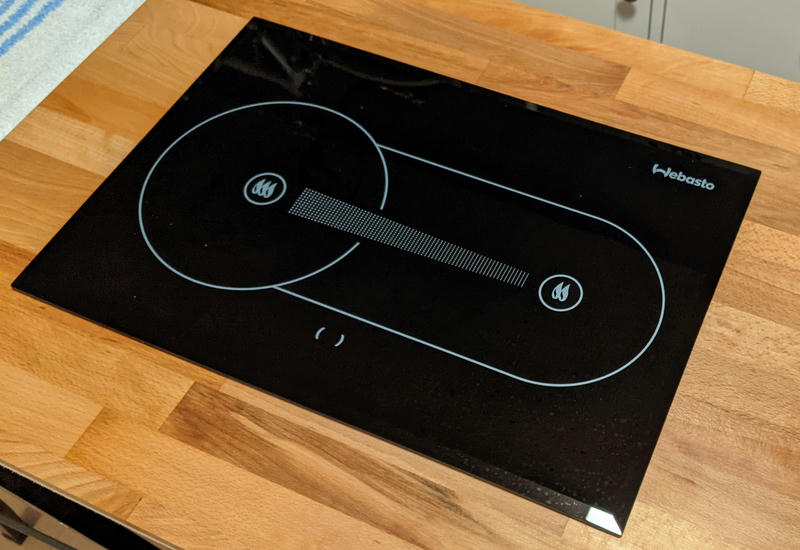
It is connected to the diesel tank of the van, thus no need for additional onboard gas to generate heat for
cooking. It is not as fast as a gas-based cooker, but it is still practical, easy to clean, and looks fantastic. It is controlled with a little panel that provides an on/off button, a button to activate the high-elevation mode and a temperature dial.
One drawback is that the lowest temperature position is already very hot. That makes it a bit difficult to
cook meat thoroughly (or anything that requires low heat for some time). However, there are two cooking fields (which cannot be controlled separately) and the second field (two flames) is always less hot than the first (three flames).
An indicator in the middle lights up when the surface is hot, but once it turns off the surface can still be very hot. I assume it is purely time-controlled and does not measure the surface temperature. The whole unit is actively cooled by a little fan operating inside.
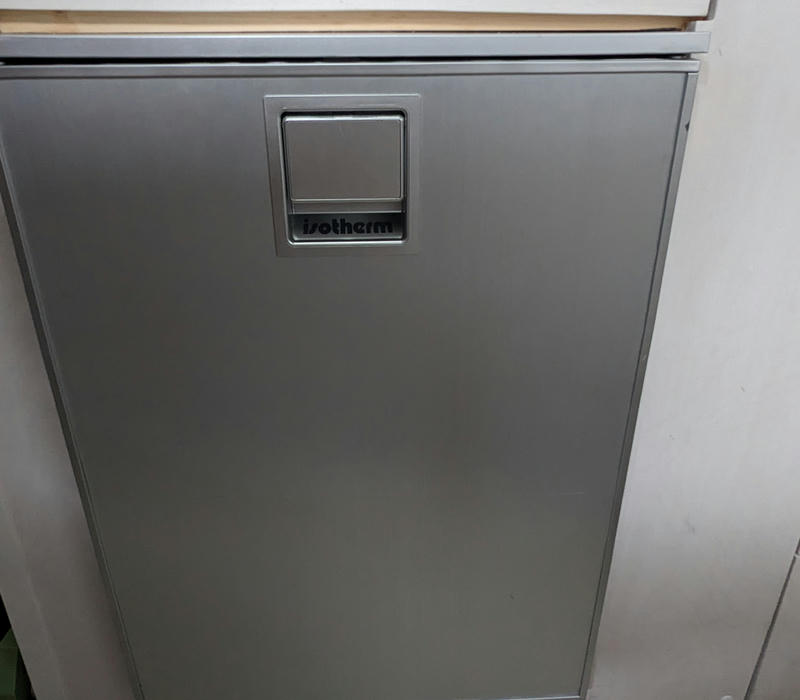
Webasto Fridge (Isotherm)
I decided to buy a compressor fridge from Webasto. It provides a fridge and an integrated freezer with very low energy consumption. The noise level is very low, too. The fridge has proven itself in the endurance test.
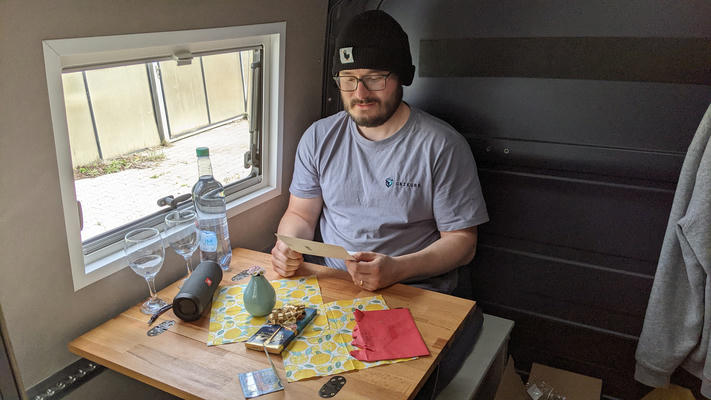
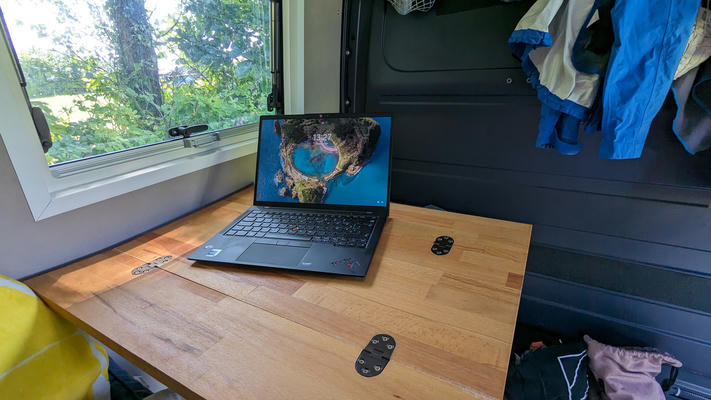
The Seating Area
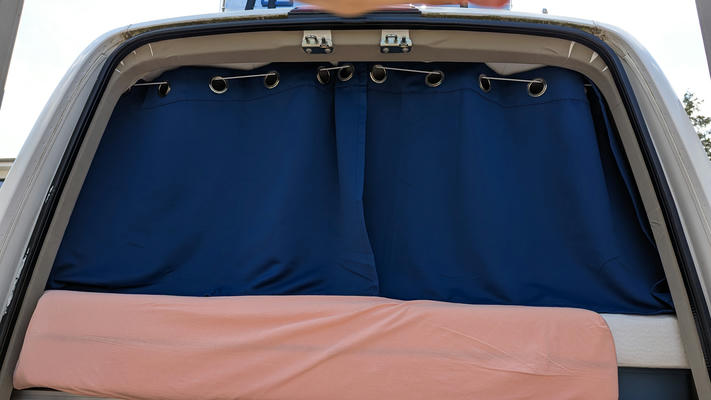
The Slide-out Bed
Webasto AirTop Heating and Control
I decided to add the Webasto Air Top 2000 as an active heater for the living area to the van.
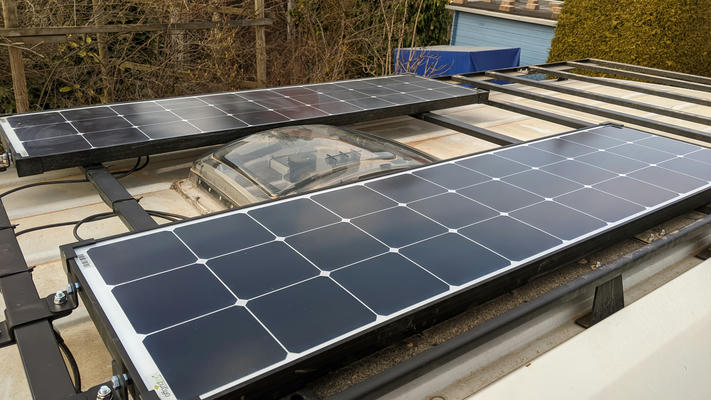
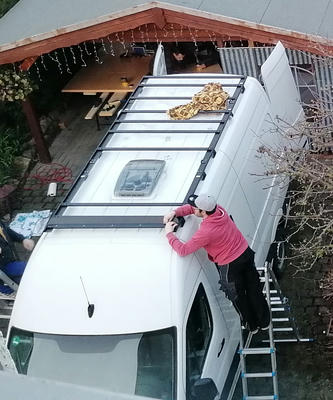
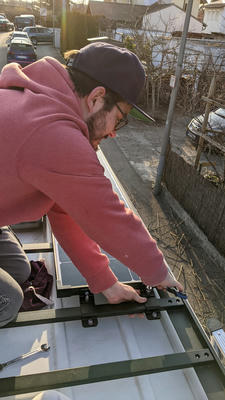
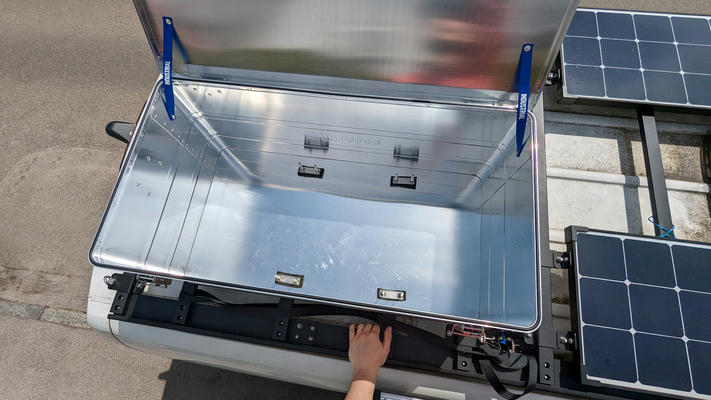
The Roof
The roof is equipped with a proper roof rack. It's black, flat and looks fantastic. I mounted two solar panels (~240 Wp combined) and two 140-liter alloy boxes for additional space.

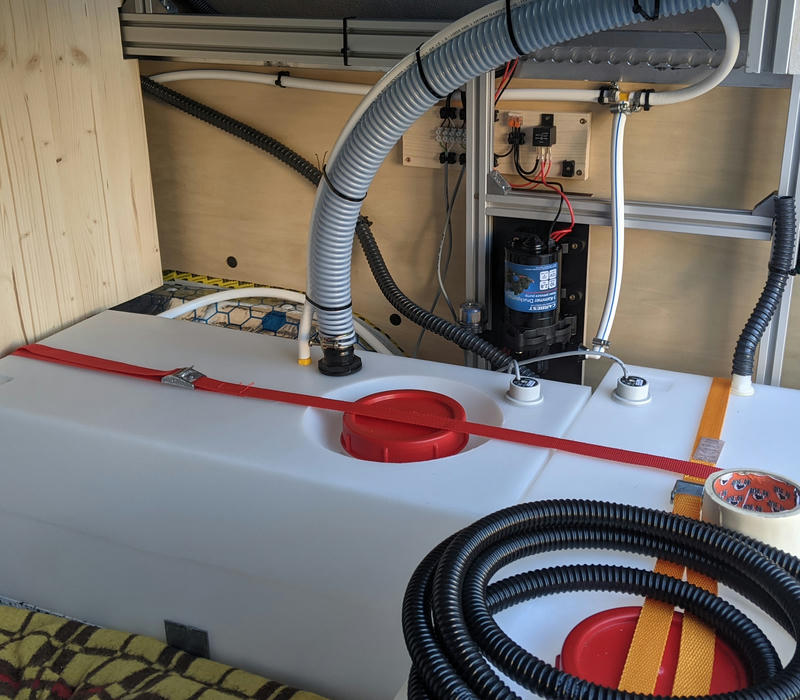
Onboard Water
I installed two 75-liter water tanks in the back. One stores the fresh drinking water, and the other one
keeps the wastewater. They are installed in the car so that the water does not freeze in winter. There is
a water pump with 2.8 bar pressure which allows convenient water extraction and is fun when showering outdoors.
The water reserve is enough for about three days with moderate water usage (normal cooking, cleaning dishes, washing) and even longer with restrictive water consumption. The sensors constantly report the filling levels.